"Life isn't long enough to do all you could accomplish. And what a privilege even to be alive. In spite of all the pollutions and horrors, how beautiful this world is.
Supposing you only saw the stars once every year. Think what you would think. The wonder of it!"--Tasha Tudor


Wednesday, May 27, 2009

Corgi grooming 101: The Corgi Coat

If you go to a dog show and watch the breeders and handlers grooming their dogs, you will quickly discover that there are about as many different techniques and products being used as there are Corgis. A correct Corgi coat should lie flat. Should your Corgi have a bit of a wave or cowlick to get down, it can take a bit of creativity to get that flat. Unless you are bringing your Corgi into the show ring, you probably won't be too concerned about getting those cowlicks or waves down. Showing or not, it is still fun to keep your Corgi looking clean and spiffy. So to continue with my little basic grooming series, let's move on to combing and brushing.

For some of this, I will refer to Deborah Harper's book "The New Complete Pembroke Welsh Corgi." Sadly, this book is out of print but you can sometimes find a copy on eBay. It has a wealth of information as well as interesting back history and bloodlines that have had their mark on our breed. Maybe if we all beg Debbie she will tell her publisher that it is time for an updated version. I'd be first in line to buy it. Debbie is not only a lovely friend but an awesome mentor. I always learn so much from her and it is most comforting to know she is always there when puppies are about to be born. The Tasha Tudor illustration above, the black and white photos for correct paw fur trimming which will be in my next post as well as quoted material from her book is used here with permission. The color photos were quickly taken over the weekend by Mary Elizabeth and I.

Debbie writes: "We start at the back end of the dog, at the very bottom of his pants, and work up over his back and sides to the front and end with the chest coat. An English fine comb or a natural bristle brush is used, and the coat is worked from the skin out in the direction the hair grows. Be careful not to scratch the skin as you work. With a dense undercoat, only a very small section can be done at a time. Grooming the coat in this manner will get the undercoat and guard hairs all going in the same direction and will give a smooth, even, rich appearance to the coat. If the coat is full of static electricity, making it difficult to handle because of the flyaway hairs, dampen the coat slightly with a fine spray of water as you work. After all your efforts are done, the dog will give himself a good shake, letting you know he prefers to go dressed his own way..."


What Debbie describes above is what is referred to as 'line combing.' As in the photo below, you will use your hand to hold back the fur above the small line or section of fur that you are about to comb out, toward the natural direction the fur grows, then dropping another small approximate inch of fur while holding the fur above that new section up and proceeding the same way.
The first time you do this combing will probably be the most time consuming part of the entire grooming process. With regular combing and brushing, it will get quicker and easier as you practice. Once or twice a year, expect to have a pretty big shedding which will take a bit more time to handle.

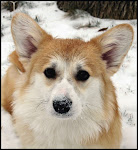
Here is a Corgi who is slightly shedding, before line combing. You can lightly spritz the entire coat with water and using a pin brush, Mason Pearson or your comb, back brush the coat in the direction opposite the way it grows so it sort of sticks up or out and then work on each section as described above.

Hold up the fur with one hand and then comb in the direction the fur grows, inch by inch, with the other hand.
The coat after line combing.
Some people train their dogs to lie down quietly on their sides as they are being groomed or combed out. I spent the day at Sue Jacob's (artist extraordinaire) painting yesterday (but that will be show and tell for another day's post!) Sue started grooming Corgis back in her days as a junior handler. Her dogs always look beautifully groomed. Sue gave me a few tips to share with you. She put Liat (her cuddly handsome sable boy) on his side and he was very happy to lay there for his pampering. After bathing, Sue towel dries the dog well and then after about 20 minutes starts the blow drying process. While blow drying, she is using her comb or pin brush (never one with 'balls' on the end, as she feels it tears the coat, but rather one like I described in my earlier post) and works through the fur in the direction of the coat. She starts with the dog laying down on his side, working around the turn of stifle, sort of line combing from the belly, up to the top. In addition to using a greyhound comb, Sue sometimes likes to use an even finer, almost a 'flea' comb as well as a soft slicker brush on each section as she goes along. After doing the sides, the dog stands up and she works the line from the tail to the head and around to the chest in the same manner.

There should be no scissoring or trimming of the Corgi anywhere on his coat other than on the pads of her paws in order to create a nice clean oval foot, which I'll share with you in the next post.

I've received all of your emails that you are printing out this little basic Corgi grooming series. As soon as I'm finished (we still have basic nail grooming, etc.) I will try and put them all together into a free downloadable file for you as soon as I figure out how to do it. If anyone would like to spare me the time trying to figure it out, do send me an email at christmascorgi@gmail.com and I will be most grateful.

Still to come: Pretty Paws and Nails and getting that Corgi coat healthy from the inside, out.
xo xo -CS ^..^

Wednesday, May 20, 2009

American Idol


What an awesome finale show! I must say that Kris won me over a bit last night but Adam Lambert has been my favorite since the beginning. Here's a little Corgi tribute to his fantastic performance. I'll be in line for your first CD! -CS ^..^
p.s. Corgi grooming posts to continue shortly!

Tuesday, May 12, 2009

Be Careful What You Wish For, and a Quick and Delicious Soup.

Every day I would go outside, hoping that one of the chickens would lay an egg. Now they are laying consistently and I find myself with a plethora of eggs! I'm not complaining, though :) Does anybody have a few good egg recipes? I have a bread recipe that uses a dozen eggs (truly, it does) so I may have to dig that one out.

I have to say I am amazed at what lovely eggs they are blessing us with. This is a rather large stoneware bowl. It is the old Mayflower Corgi Club pottery pasta bowl. I'd say the eggs would be sized as 'large.' It seems like it took such a long, long time for them to start laying. Has anyone else ever had hens that didn't lay until they were almost a year old? I understand they should have started when they were about 6 mos. old for this breed, the Silver Laced Wyandottes. Oh well, late bloomers I guess. Maybe just the long dark Winter.


I love a good home made soup, especially chicken soup. Some people call chicken soup with little meatballs Italian Wedding Soup. We just call it chicken soup around here since the little meatballs are a given. There is mutiny amongst the ranks when I don't include them. There are nights when I feel like having soup but just don't want to spend hours cooking stock and taking chicken off of the bones. I still want something healthy, delicious and nutritious to feed my family, however. Here is my quick and lighter chicken soup recipe. It needs a name. Since it is quick and easy and usually made on the spur of the moment, How about Cathy's Italian Elopement Soup or maybe Cathy's Shotgun Wedding Soup? :) It is quick because I use store bought stock or your own stock you have in the freezer, boneless chicken breasts, dried herbs and spices from the pantry and you don't cook the pasta separately. The most time consuming part is making the little meatballs.


Ingredients:
  • 1 large can (48 oz) of College Inn Light & Fat Free 50% less sodium Chicken Broth

  • approximately 1 pound of boneless chicken breasts, either thin sliced or split are fine, cut into bite sized pieces. (*hint: do you have a kitchen scissors? After washing the chicken, you can use your scissors to cut it into small pieces quickly and right over the pot! These scissors should be washed thoroughly before and after use and only used for cooking)

  • 1 pound of fresh carrots, peeled, rinsed and cut into bite-sized pieces

  • 5 or 6 ribs of celery, washed and cut into 1/2 inch pieces. Include some of the tender light green ones from the center, including the light tender leaves.

  • 2 medium or 1 large onion, chopped
  • 1 pound of the leanest ground beef
  • 1/2 cup of flavored or seasoned breadcrumbs
  • 1/2 cup grated romano or parmesan cheese (better cheese makes better meatballs) and more for topping the soup later.
  • 1 fresh egg
  • milk (you can substitute water)
  • one 8 oz. can tomato sauce

  • Spices and seasonings: dried basil, dried oregano, dried parsley flakes, garlic powder, sea salt and ground black pepper

  • 12 oz. small egg bow-ties pasta

  • fresh cold water


Put chopped carrots, celery, and onion in a large soup pot. Add enough water to cover veggies with about 4 inches extra. Cover the pot. Bring to a boil on high flame and then lower the flame to a low-medium boil. Keep the lid slightly ajar so you don't boil over. While the veggies are gently cooking, get started on your meatballs.


Miniature soup meatballs: You will need a medium saucepan and a colander. In a bowl, combine one fresh egg, breadcrumbs, grated cheese (I sometimes add more cheese than 1/2 cup, but do what you like!) about 1 tablespoon of dried parsley flakes, a pinch of dried basil, oregano, salt (if desired) and black pepper with about 1/8 cup of milk. Mix well and add the ground beef. Mix with a spoon and then continue mixing with very clean hands. Form the mixture into little bite sized meatballs. Put them into the medium saucepan and cover with cold water. Bring to a boil and cook until done, approximately 10 minutes. They will turn a dark greyish color. Check to make sure there is no pink left inside. Drain them in a colander and rinse with clear fresh water. Sounds crazy, but the rinsing really removes the fat. Drain.

After about 10 minutes (it will take longer than this to do your meatballs so keep an eye on the veggies.) Add your chicken broth, tomato sauce, chicken, about a tablespoon each of dried basil, oregano and parsley flakes, about 2 teaspoons of garlic powder and a good pinch of sea salt and ground black pepper. We want to cook the chicken here. Check it in about 20 minutes or so. Keep the soup pot on a very low simmer while you are finishing up your meatballs. *Variation note: if you have it on hand, and if you like it, you can add a few handfuls of chopped fresh escarole here. Once the meatballs are cooked, rinsed and drained, add them to the soup. Continue simmering for about 10-15 minutes. The soup should look a bit 'watery' at this point but will come together after you add the pasta. If you think you've boiled out too much liquid, you can always add a bit more water and a chicken boullion cube or a small can of chicken broth if you have it, but as long as there is enough liquid to cook your pasta, I would leave it alone. This is a hearty soup.

Raise the flame to create a good medium boil and add the box of tiny egg bows. Cook for about 7 minutes and turn off the flame. The soup is ready! Serve with freshly grated cheese and some fresh ground black pepper and salt to taste.
Do ahead tip: You can chop all of your veggies and make your meatballs in the morning, and refrigerate them until you start your soup for dinner. As I said, the meatballs take the most time, but they are so worth it!

Give it a try. Bonus? It is even better the next day and freezes well. Let me know how it goes over at your house. -CS ^..^

Sunday, May 10, 2009

Happy Mother's Day!

I had picked this shelf up at a tag sale on our street months ago, thinking it was just tall and skinny enough to fit on one of the walls in my studio. For Mother's Day, my daughter painted it in the blue that I painted these drawers (the ones with the red rick-rack and toadstool looking knobs.) Actually, the color you see in this photo on the shelves is more true to what the color really looks like. Slowly but surely my little studio will get done.
She did a fantastic job and I love the way it turned out. Thank you, Laura! I love you my sweet and beautiful girl, with all of my heart. xo xo

Here is Amy Rose who joins me in wishing all Mothers everywhere a lovely Mother's Day! xo xo -C ^..^

Wednesday, May 6, 2009

Cathy's Corgi Grooming 101: Drying Your Corgi


Blow drying:

So you've got your baby out of the tub. She's nice and clean with no soap residue, right? Right. If you have a grooming table with an arm, set your Corgi on the table and slip the noose over her head, securing it lightly with the little tightener that slides up and down. You remembered to attach the safety release, yes? You don't want to make the noose too tight. Our goal is to train her so she knows that when it is grooming time we stand on the table and don't try to jump off and run. It is your job to make her feel safe and secure. It is your job to never leave her for even a second alone on the table. If you have forgotten something or need to get the phone, wrap her in a towel and carry her with you. It is better that you get wet and hairy than to risk her safety.

Now we need to start drying that coat. If she has blown her coat and is practically naked, then obviously the drying process will go a little quicker because you are not dealing with undercoat. If she is in full glorious coat, the drying process will take some time. Either way, I do not recommend letting your Corgi 'air dry.' A Corgi is a double coated breed. The lovely coat that offers them a bit of protection from the weather, also helps to hold in all of that water once they do become wet, like after a bath or a swim. Especially in humid weather, it can take a long, long time for a coat to completely dry and the moisture can cause it to smell sort of 'mildewy' or 'wet doggy' which you can prevent. Also, if you put your dog in a crate to dry with a towel, you will have a very wavy, dented 'bed head' looking coat that can take many washes to remove. With proper grooming, you can train the coat to lay flat and look pretty.

After a good brisk rub with the clean dry towel and the ears have been cleaned, (see previous grooming post) I usually just run my greyhound comb over and through the coat quickly before I start blow drying. It may feel like your comb is gliding through easily and that you have done your job combing, but trust me. You have not begun combing yet. The best thing to dry your Corgi with is a forced air dryer. If you do not have one, you can use your regular blow dryer, but please, put it on warm or cool setting if you have it and always keep a finger between the dog's coat and the dryer so you are aware of how hot it is. I usually start by blowing the water off of the coat from the back of the head and work my way toward the rear. If you have a forced air dryer with no heat, you can put the nozzle right on the coat and with the nozzle facing toward the rear so the fur is blowing in the direction it grows and slowly blast off the water. Keep doing this for a few minutes. You can blow the fur in the other direction every now and again just to make sure that you are getting the roots dry but try and generally keep the nozzle pointed toward the rear to train the coat to lay in the right direction.

If you are using a regular (hot/warm air) blow dryer, you want to do the same thing, but do not put the dryer so close to the fur. You can damage it really quickly, not to mention burn your dog. Be careful and pay attention. Next, I go back and forth on the sides of the dog. I usually blow in little 'circles' around the shoulder and upper arm and around the turn of the stifle and thigh muscles. Do both sides. Go to the front of the dog and starting under his chin, start blowing the fur. I usually go up and down between his front paws all around his chest. I don't worry about blowing in the direction of the fur on the chest. If we puff it up a bit, all the better. It will fall back down naturally on its own as it dries and calms down. Lift each leg and get under those arms. Rub the fur with your fingers, really get it nice and dry under there, gently pulling the fur down toward the feet as you do. Run the dryer across the belly gently. Rub with your hands as you dry, gently pulling the 'fringe' down with your fingers. Go to the inner thighs. Be especially careful around their private parts. If you have an intact male, never use heat in this area as you can render him temporarily sterile. Even if he is neutered, be careful. Girls too, it is a sensitive area.

Lift and dry each foot and go up a bit further to dry the hocks. Keeping him on a dry towel as you work will help dry his feet as you go as well. Let's work on the rear. After drying the hocks, start drying the pants. If you have a Cardigan, hold up the tail and work on the pants a bit. You can dry in circular motion, spreading the fur outward to fluff them up a bit as you dry them, taking care not to push up the fur on top of the nub (for a Pem) because we want to create a nice flat back. If you have a tail, start close to the body and work your way, back and forth down the length of the tail. Try and pull the 'fringe' of the tail down and out as you dry it so it looks like a lovely feather.

Turn off the dryer for a few minutes. You may think your dog is dry, but chances are she is still wet underneath. This is a good thing! It means you have a luscious undercoat and the coat is doing its job. Let's quickly comb the dog again, head to tail, sides, chest, pants. Start the drying again. Let the air lift and separate the coat down to the roots and then push it back in place again. You can start using your pin brush now as you continue drying, brushing along the airstream of the dryer. If you are working with a hot blow dryer, do hit it with a 'cool shot' if you have that button for the last few minutes of drying to help close the hair shaft and prevent breakage.

We want to make sure the undercoat is completely dry to the roots before we start combing. It is OK for the topcoat to be a bit damp, in fact during regular daily or weekly combing and brushing you never want to comb a dry coat. Always keep a fine mist spray bottle of cool water with your comb and brush so you can lightly spritz before combing. It will encourage new growth and protect the lovely fur from damage.

Upcoming grooming posts: Line combing/brushing, nails and coat maintenance from the inside, out.

Still with me?-CS ^..^

Tuesday, May 5, 2009

Keep Calm and Carry On.

What do you do when you have a million things that need doing? Because I have so many things that I like to do and that need doing (like work and daily chores) I can easily slide into a state of chaos faster than you can say Corgi pants. Add to the mix something that is worrisome or a situation that I keep mulling over in my head or am anxious about and I can freeze like a deer in the headlights and easily bring my entire day to a standstill, accomplishing nothing. When I have lots to be done, I like to make a list for the day. I'm a big list maker. Somehow, the act of writing down my 'to do' list frees my head up to think about the task at hand.

Some days my list can go on and on. Not even if I were a super woman robot could I ever accomplish everything on that long list. But I still make it. It helps me to put things into perspective. At the very top of the list, I write down whatever has been heavy on my heart and could cause me to worry. So I have my list. Then what? I take that first thing at the top and pray about it. I promise to do what I can about what I can, and put the rest into God's hands. Then, I take a good long hard look at the list and find the one thing that I've been dreading or putting off and make that number one. I make it the first task to get out of the way and number the rest of the list by priority for that day.

From there, I just start chipping away at my list, one task at a time. I know I can get a lot done, just not all at the same time. One foot in front of the other, one task at a time, what needs to get done gets done. What doesn't get done will have to wait for another day.

I love the vintage WWII British "Keep Calm and Carry On" poster. I think what makes it so appealing to so many people is just that. It reminds us to stay calm and keep going. Take care of your loved ones and yourself and keep priorities in perspective. Keep moving calmly and purposefully from task to task and things will get done.

Have a happy day my lovelies. Carry on. -CS ^..^

Saturday, May 2, 2009

Movies I can't wait to see!


I know, I know. I'm breaking up my Corgi Grooming 101 posts. But it is the weekend.... I just had to post about a couple of movies that I'm so excited about. The first is Julia and Julie, based on Julie Powell's book. Here's the link to the website where you can watch the trailer. My friend Tracy and I used to chat on the phone while watching those PBS episodes of Julia Child and Jacques Pepin cooking together. Completely fun to watch. Tracy is an amazing and inspired cook. Her dad is a rather famous chef so I guess it is in her genes. I hope we can go and see this movie together. It stars Amy Adams as Julie and Meryl Streep as Julia Child. Go and watch the trailer here. I'll wait. Wanna see it now, right? I know! It opens August 7th. Perfect Summer movie.

The other movie which opened yesterday is X-Men Origins: Wolverine, starring Hugh Jackman. (ooh la la....) If you are familiar with the X-Men, you will know that the Xavier School For the Gifted is set in Salem Center in Westchester County, NY. Maybe Hugh will knock on my door one day and surprise me? (Oh stop, a girl can dream, can't she?)

The Mister and I are hoping to see it this weekend. Huzzah! I will try not to swoon. Much. -CS ^..^